Showing posts with label business. Show all posts

Wednesday, September 9, 2015

New Jewelry -Keeping Busy in France

I debated quite a while to decide whether or not to bring my jewelry making supplies with me to France. In then end we moved without them, and then I had them shipped over.

While I've been super busy with classes, travel, visitors, etc. I have had a LOT of alone time at the house. So.. I'm really glad I had my supplies with me.

My business has been closed since we moved, but I've been working hard on making new designs to have a LOT of new inventory when we go home. As of today I have just under 150 new pieces to bring home with me in December!

I decided to share just a few....

Colored Brass items are hand painted by me.

Click the photo to enlarge in new window to see detail.

Little Animal Friends

Little Bit of Romance


Hand Painted Southwest Design


Burnt Red with Vintage Glass Cab wrapped in Brass Filigree

Cobalt Blue with copper and crystal accents

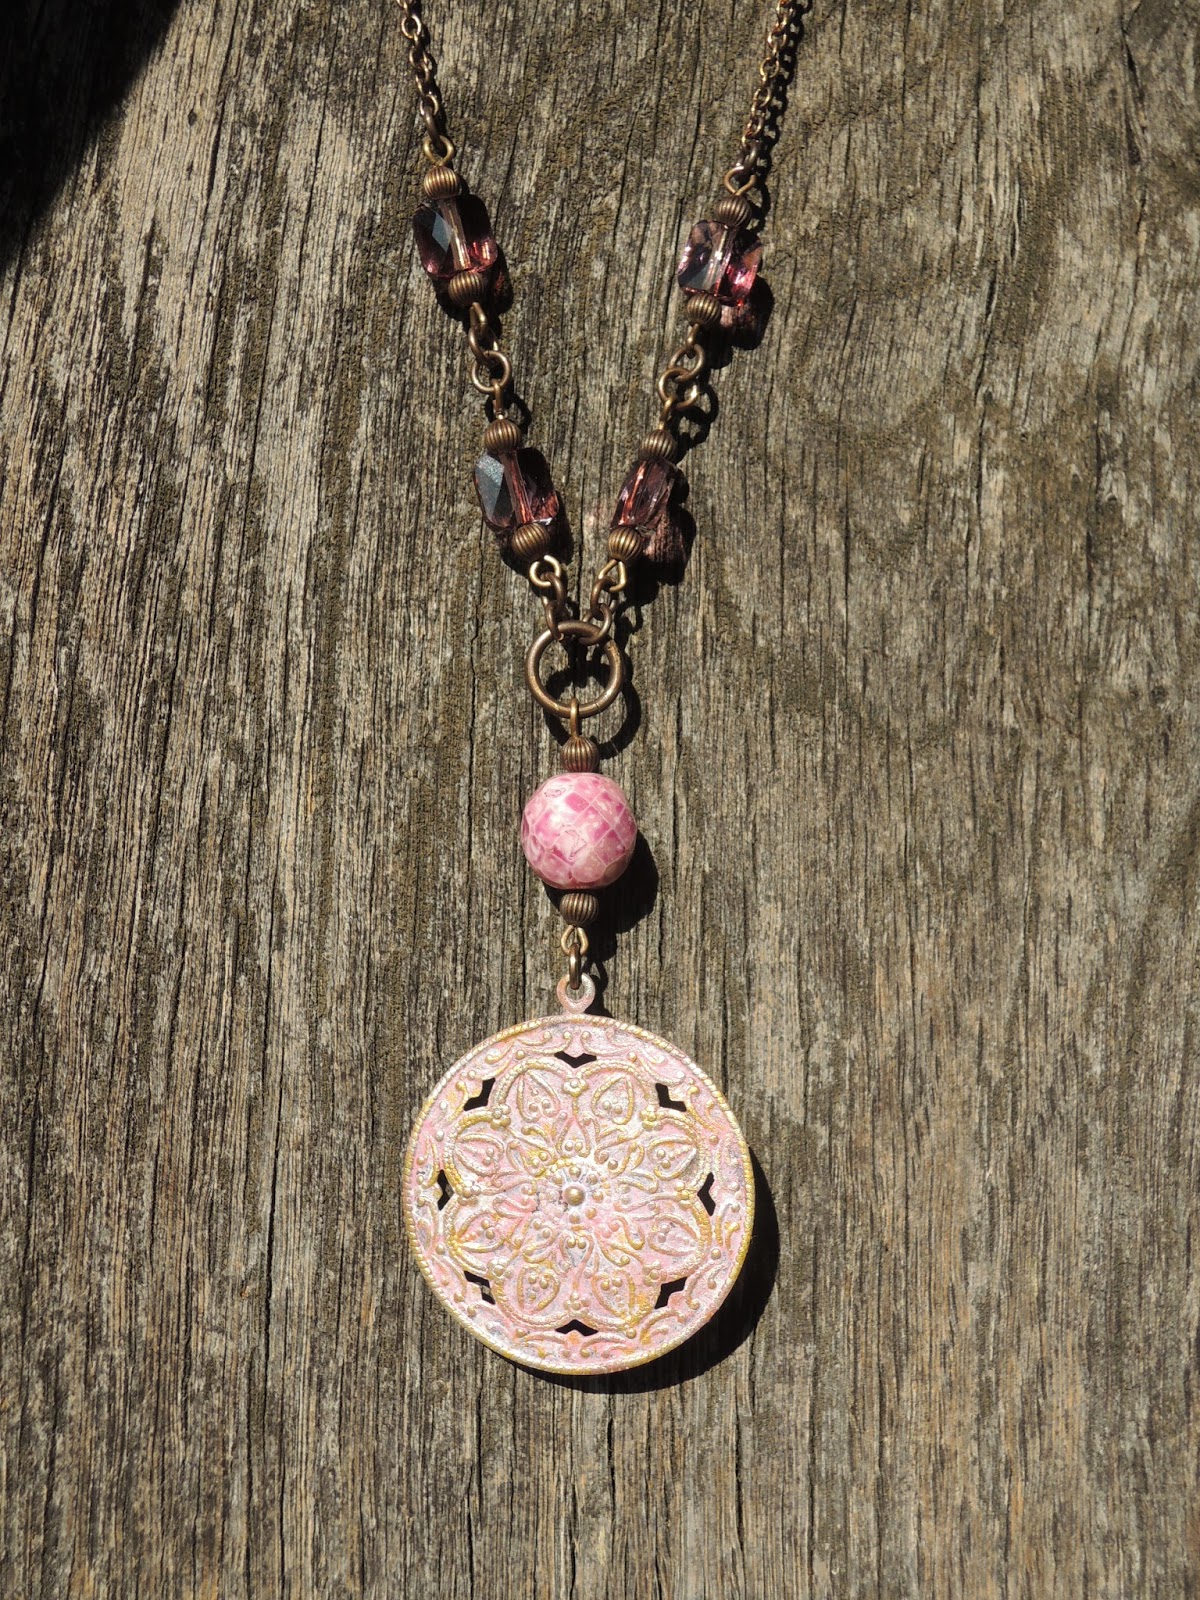
Rose Pink with square crystals


Tuesday, October 26, 2010

Tips for Organizinging a Successful Small Vendor Show

I don't do a lot of shows but each year, especially this time of year, I participate in what we call 'Vendor Shows'.

I'm sure you've heard this term. As opposed to a 'craft' show, a vendor show usually consists of a mix of direct sales (Pampered Chef, Tastefully Simple, etc), independent business people, and independent artists or craftspeople (like myself).

I recently was responsible for recruiting the vendors for an annual show we have at our church each year.  Here are some tips for organizing a successful show.

1.) Start recruiting vendors early. Our show was in mid-October and I started contacting vendors in early August.

2.) If you had the show previously always last years vendors first shot at a table. This allows you to build a relationship with vendors you enjoy working with. Also - your customers will come to know who will be there and over time attendance will grow.

3.) VARIETY, VARIETY, VARIETY. This is so important. Not only to the customers, but to the vendors.  I recently attended a vendor show for the first time. There were 21 tables and 6 of us sold jewelry.  That's 28% of the vendors selling jewelry. Not a good show for me.

This was my approach:  First I opened it up to vendors from the previous year. Luckily, of those responding I didn't have any more than 2 vendors that sold similar products. That was my limit. No more than two.

Even then - try to keep them as different as possible.  Most people who organize shows understand that you don't want two tables selling the exact same item (say two Creative Memories tables) - but you need as much variety as possible.  So of the  tables I did have here was my mix:

Two jewelry (1 handmade, 1 direct sales)
Two food (Homemade Gourment, Tastefully simple - one more entrees, one more snacks, spices etc)
Two books (Usborne - books for kids, 1 Independent author selling her own books)
One Photographer
One Scrap booking
One handmade bows for little girls
Two purse/bag companies (they were similar and at the same time very different)
Scentsy (I also tried to get a handmade candle person - but was unsuccessful)
Avon
Two House/Kitchen wares (Pampered Chef and Tupperware)
One handmade knitting items

I held firm to not allowing any more of each type of vendor.

4.) Make sure your table fees are reasonable. We charged $25 per table with a limit of two tables per vendor. $5 for electricity. Unless you can guarantee at least 200 people will attend your show, I don't think you can charge more than this.
5.) Decide where and how you're going to advertise. We put ads in some local newspapers, created fliers and did as much word of mouth as we could.  Also - we required each vendor to personally invite at least 25 people. Tell your vendors where you advertised. If attendance if poor they may blame you if you can't prove that you worked to get the word out.

6.) Communicate with your vendors. Let them know exactly what you will provide and what they need to provide. For example, we provided tables, but not table coverings. Coverings were required so the vendors needed to know they should bring their own.

7.) Give the vendors plenty of time to set up. We had setup times the night before and early the morning of the show.

8.) Don't overdo the hours of the show. All day for a smaller show is often way too long and your vendors will get bored and want to pack up early.  Our show was a Saturday from 8:00 am to 2:00.  In retrospect 9:00am to 2:30 may have been better.

9.) Provide at least coffee free of charge for your vendors.

10.) Make sure someone is there the entire time to answer questions and make decisions if necessary.

11.) Put some thought into you table organization and traffic flow. Never put two similar vendors next to each other. This makes the vendors uncomfortable and the customers too! 

12.) Have fun and talk with your vendors. Follow up with a survey and ask them what was good and what could be improved. Ask them if they want to be contacted for the show next year.

There is a lot more I could ad - but I'll save that for later. I hope this helps. Vendor shows of 10 tables or more are difficult to do without help and coordination - but with some planning and a little bit of work - they can be a GREAT event for the vendors AND the customers.

Good luck!

Tuesday, February 9, 2010

Harnessing the Power of Feedback

As a seller we all enjoy looking at our feedback on our Ebay, Etsy, Artfire, etc. stores. I love to see my feedback number go up and I'm quick to click to see what my customer has said. And woe be the day when a neutral or - heaven forbid - negative - feedback is left. Sure way to ruin a great day.

But other than that little cozy feeling - what good is feedback to you as a seller?

Use Feedback as a Selling Tool

The most powerful way to use good feedback is to make sure your future customers see it. The best way to do this is in any of your social networking environments like Facebook, MySpace, twitter, newsletters etc.

When I get good feedback on a product I can re-list I almost immediately post to Facebook. I call these "What my Customers are Saying" posts. I copy the feedback exactly. For example a Facebook post may look like this:

What my customers are saying: Beautiful earrings, exactly as pictured. Fast shipping -- overall great deal!

Then I post a link directly to the re-listed item so the person reading the post can see what item the feedback was left for, and hopefully will click on it.

If you get enough of these, your Facebook fans will start to see a pattern of happy customers.

In addition, I include generic What my Customers are Saying quotes in my email newsletters. I may, or may not include links to the product in this case. But I try to have a small section of my correspondence show my existing and hopefully future customers that I do have current happy customers.

What if I'm not getting feedback?

Many buyers may not even be aware that they can or should leave feedback. So, with each purchase encourage your customers to let others know they are happy with their purchase.

But - make sure to tell them to contact YOU first if they are unhappy. This gives you the opportunity to resolve any potential problems before a customer has left feedback. This way, even if a customer wasn't initially completely satisfied, they may still end up leaving positive feedback because you exhibited exceptional customer service.

To help encourage my customers to take the time to leave feedback, I purchased special business cards just for this purpose. I used VistaPrint to get very inexpensive cards and include them with my standard business cards. I do not use these as handouts at shows, but only for online purchases.

Here is an example of the card I use (click to see larger image). I have two main online stores, which is why there are two store addresses. Tailor your card to your business. The important parts of this card are: 1.) Tell the customer to contact YOU if there's a problem. 2.) Encourage the customer to leave feedback if there's not.


Then - take that feedback and turn it into a selling point.

Wednesday, September 30, 2009

Don't 'Over Expose' Your Business

True story - have fun with it...

So - I was doing a craft show in my home town last December. I had just bought a fabulous new blouse from Coldwater Creek with the coolest tiny metalic buttons. Loved the blouse so wore that to the show.

Things were slow and I was sitting down and a couple of people walked by. For some reason I looked down and EVERY SINGLE BUTTON was undone and my shirt was WIDE open.

Let's just say I had 'over exposed' myself!

My face turned every shade of red there was. I honestly don't know if anyone saw me or not. If they did - they didn't say anything. I had my hand on that blouse for the rest of the day and took it back the next week.

So - dress for success - but maybe stick with a pull-over! Carla!

Tuesday, September 29, 2009

The Economics of Selling Floss

I've been surveying my customers to see if they thought I should start selling embroidery/cross stitch floss in addition to the cross stitch designs I sell. The consensus was an overwhelming YES - especially if it could be sold at a discount like I do with my charts.

So - I spent most of two days looking into wholesale sources for floss. Well here's what I found:

1.) DMC floss is sold in boxes of 12 skeins per box.
2.) The WHOLESALE price (what I pay) of a box around $3.96 - which comes to .33 cents per skein.
3.) The SUGGESTED retail price for a skein of floss is .66 cents.

Wow - I never knew this. Most people tell me they get it at stores like Hobby Lobby or Michaels for anywhere from .35 - .50 cents - but it can be on sale for 4 for a dollar or even 5 for a dollar.

So - what does this mean?

Well - you're local LNS is probably making little or no money when they sell floss. .05 - .10 cents at most. So how can Michaels or Wal-Mart afford to have 5 for $1 sales? They buy 100's of thousands of boxes of floss as opposed to a couple of thousand a year (if that) by a small independent LNS store. So - they most likely get a GREAT deal, at far below wholesale. OR - they can afford to offer a great sale on a low-cost item like floss, because they know you'll most likely come in and purchase something else in addition to floss. This is called a 'loss-leader' and means they're willing to take a small loss on one item to gain a larger overall sale.

So - next time you have the luxury of visiting a local LNS - you'll have a better understanding and appreciation of why their prices on floss are what they are. I certainly appreciate it more!

Now - will I be selling floss? It's a tough call. Let's say I buy all the colors at .33 cents a skein and I offer it for .43 cents a skein. A customer shops at my store (yeah!!!) and purchases 3 skeins of floss for $1.29. I would make .30 cents - that's good!

But then the customer pays with a credit card or PayPal (which I encourage). The minimum fee for a transaction this size would be approximately .45 cents - so I would actually LOSE .15 cents.

This is why you're seeing the minimum shipping costs of $5.00 and minimum purchase amounts of $10 or more on many sites.

I am going to keep pursuing the issue - but I need suggestions. How can I offer this GREAT service to my customers, and not lose money doing it?

Regardless - I thought the whole story might enlighten you as it did me. I always figured floss cost the store maybe .10 or .15 cents and they were really marking it up - but not so.

You're ideas, comments, input etc. are GREATLY appreciated.

And so ends your lesson in economics for today! Thanks for reading! Carla

Monday, June 15, 2009

The Promotional Clothespin

I'm constantly looking for unique and inexpensive ways to promote my business. A couple of months ago I had a number of jewelry shows coming up and wanted some type of give-away with my business name on it.

Through my membership at Unique Women in Business (UWIB) I ran across these great promotional clothespins by TootsieBear.

You can customize them with any web address, business name or other information that will fit. You can also choose from a wide variety of paper backgrounds. On one side is your information and on the other is a magnet so your customer can put the clothespin on the fridge and hopefully see it every day.

As a bonus I use it to close the bags before I hand a purchase to my customer. This actually saves me a lot of time. Previously I was scrounging around trying to find the twisty ties for the bags I use - then taking more time to attach them.

Now I just fold the top of the bag over and clamp on a clothespin.

I have received SO MANY comments about the clothespins from customers that I know they are great investment.

So - It's a unique and functional AND inexpensive way to give your customers something to remember you by.

You can find these great clothespins by visiting TootsieBear on Etsy.

UWIB is an online group of businesswomen promoting each other. Click here if you would like information on becoming a member of this supportive group.

Tuesday, June 9, 2009

Making the Most of Business Cards

Business cards are an essential part of any business. It is an easy and inexpensive way to give someone a reminder of what you do, along with the ways a potential customer can contact you or find your store.

I use business cards to hand out when people ask what I do. I include them with orders so people will remember where they bought that favorite piece of jewelry, and I have them sitting on my tables at shows, so future buyers can check out my store or contact me at a later date.

For years I had a standard business card that I was pretty happy with. The supplier was reliable, the quality good and they were inexpensive. However I was limited to 6 lines of information. When I opened my Etsy store and started my blog - I wanted to include additional information on my card. In addition, I wanted my business card to be more of a marketing tool.

Happily I stumbled upon Moo.com. Moo.com allows you to very easily download up to 50 of your own images to use as the front of your business card. In addition, the format I selected had room for nine different lines of text, so I was able to put everything I wanted on my cards. In the picture above the top part of the image is the front of one of my cards and the bottom of the image is the back.

For a jewelry designer this business card solution is perfect because I can showcase dozens of my designs. People often stop at my jewelry table and go through my stack of cards to look at the different designs I have. And, when I tell someone I design jewelry, I can pull out 8-10 cards and go through them to show the person the types of designs I create.

The only drawback is that they are very expensive compared to what I was purchasing before. But the quality is exceptional and I now feel like I have a real marketing tool.

Wednesday, March 25, 2009

Ahhh - Tax Time and Inventory!

Disclaimer: I do NOT know tax law or give tax advice. The article below is a summary of what I have done for the last 6 years and works with my tax accountant. You need to make sure you are doing what is necessary for your own tax purposes.

Entrepreneurs are passionate about what we do. We want to create, run our business and hopefully make some money. But one thing we don't want to do is taxes!

This time of year small business owners everywhere are saying "I just want to run my business! Someone please just figure this tax stuff out for me!"

This article is about just one of the things we have to track every year - Inventory.

I make jewelry and sell cross stitch books. I have a HUGE inventory for someone who works out of their home. Especially my beads - I literally have tens, if not hundreds of thousands of beads. What's a girl to do?

Why do I need to track my Inventory anyway?

I'm not a tax expert, and I'm not going to even begin to assume to give tax advice. Everything is different for everyone depending on your state, what type of business you are etc. But here are some basics that usually apply to all.

My inventory amounts are required for my Schedule C form which I fill out for my taxes. In addition, the inventories are used in the Cost of Goods Sold Calculation.

Here are some basic definitions:

Beginning Inventory: The total amount of inventory you had on hand at the beginning of the fiscal year.
Purchases: The amount of inventory you purchased (added to) your inventory during the entire fiscal year.
Ending Inventory: The total amount of inventory you had on hand at the end of the fiscal year.
Cost of Goods Sold: The amount of inventory you 'used up' in selling your items.

Here is the basic calculation:

Beginning Inventory + Purchases - Ending Inventory = Cost of Goods Sold

Cost of Goods Sold is an expense. At tax time this is a GOOD thing - because that expense is deducted from the your gross sales. You don't want to pay taxes on your gross sales - you want to pay taxes on your gross sales less all of your expenses (net sales).

For example. I design a necklace that I sell for $50. But I didn't' actually MAKE $50 did I? If the materials in the necklace cost $15 (cost of goods sold), then I 'made' $35.

Of course there are many other expenses and considerations - this article is just concerned with inventory/COGS.

So - to simplify to the extreme - you need to know your total Cost of Goods Sold at the end of the year.

Inventory Approach #1 - Count.

At the beginning of the year count your inventory. If you make jewelry - count every bead, know what the bead cost, and add it all up. This is your beginning inventory.

During the year keep track of all purchases you make for inventory. If you make jewelry track all beads, findings, wire, etc. Everything that goes into making your designs. Do NOT count shipping, office supplies etc. Those are different types of expenses.

At the end of the year count everything again to see what you have on hand now.

Remember - if you have jewelry already made up - but not sold - that counts as inventory too! You must know the value of your loose beads in addition to the value of the beads in your "Finished Goods".

The apply the formula from above:

Beg. Inv. + Purchases - End. Inv. = Cost of Goods sold.

The good news - the next year you already know your beginning inventory - it's the ending inventory from last year!

Approach #2 - Track COGS

Here is what I do. Instead of counting my inventory at the end of every year I track my COGS throughout the year.

A couple of years ago I counted my entire inventory and determined my beginning inventory total.

I track every purchase I make.

When I store my inventory (in my case beads, books etc). I mark each item with what I paid for it. For example my beads are stored in separate containers by like type/price.

When I design a piece I calculate what it cost to make that item. I include everything, wire, crimp beads, jump rings, head pins, and of course the main components.

Then I tag that item with an inventory number and enter it into a database where I input the total cost of the design (COGS).

When the piece is sold, then I know how much I spent to make that item. At the end of every month I add up my total COGS and enter that into my books. Then at the end of the year I know how much I spent on materials without having to recount my inventory.

I use this calculation:

Beg Inv. + Purchases - COGS = Ending Inventory.

This takes a lot of organization up front - but will save you SO MUCH time and frustration at tax time.

Is it 100% accurate? No - of course not. But how accurate is it when you count 150,000 individual beads and aren't really sure if you paid .06 cents or .08 cents for any given bead? I believe the system I use, in my situation, is more accurate then trying to count.

In addition, I am much more aware of what it took to design a given piece and therefore am better at knowing what to charge for it.

Hope this article makes sense and is helpful. Please feel free to post comments/questions.

Please do NOT copy this article. If you want to refer to it - please post a link to my blog. Thank you!

Sunday, September 28, 2008

My Own Little Corner

I thought I would share a couple of photos of my work space at home.
Below is a picture of me sitting at my beading table.


I use this table exclusively to bead. Behind me are two storage units I purchased when I first started. I thought I would NEVER fill them! Hah!

A couple of years ago I bought the white storage units on the left. They were originally designed for scrapbook materials, but you can purchase them with large and small trays to hold beads.


They are fabulous! Now I have much more visibility of what I own, and much more storage space. Below is a picture of a couple of the drawers pulled out to show how the inserts work. These drawers are shallow, some of my others are deeper for larger beads/pendants. The biggest advantage is that have a much better idea of what I have - I'm not losing things in big boxes or bags.


This next picture is of the area I use to do my altered art work. I cut, glue, solder and sand here.


The last picture is of my desk with my computer. This is where I spend most of my time. My scanner is here and I can scan cross stitch covers, update my inventory, process orders etc. I also have a digital scale attached directly to my computer to compute my postage for me.


This desks wraps around and there is another identical unit with my husband's computer and work area. We have a laser printer and color photo printer set between us to share.

You'll notice my bead table also has a laptop on it. We have the laptop on wireless network/internet so it can be used anywhere in the house. I use it daily at my bead table.

All of the photos are located in one room - our office in our basement.

Hope you enjoyed seeing where I work. Please fee free to comment or ask questions.


I have a whole other part of the house used for storage for cross stitch inventory, shipping materials etc. However it was WAY too messy for photos. Some day...